Step 1
Dedicated lab bridge
Created vmbr2 as a separate virtual switch for the pentesting lab, keeping it away from both Proxmox management traffic and the Wazuh SOC lab bridge.
Project Case Study
I built an isolated penetration testing lab on my Proxmox server for authorized cybersecurity coursework. The goal was to import a set of VMware-based lab machines, separate them from my home network and Wazuh SOC lab, and create a controlled environment where Kali can communicate with vulnerable Linux, web application, and Windows targets.
Build a safe, repeatable pentesting environment that supports intrusion testing coursework without exposing vulnerable systems to my home network. The lab needed to run beside my existing SOC lab, while remaining separated enough that scans, exploits, and vulnerable services stay contained inside a dedicated virtual network.
.vmdk virtual disks into Proxmox using qm importdisk.192.168.56.0/24 subnet.
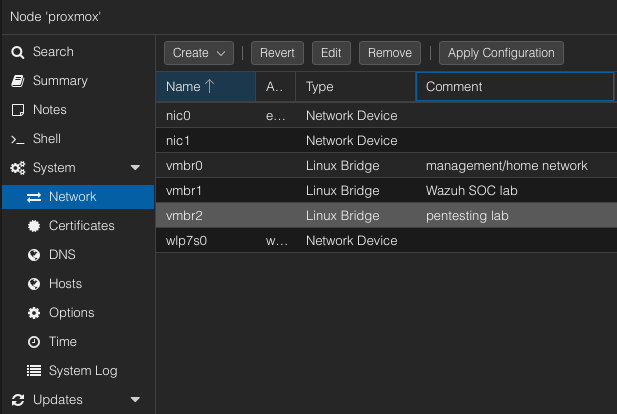
I kept the lab intentionally segmented. vmbr0 is used for Proxmox management and normal network access,
vmbr1 is reserved for my Wazuh SOC lab, and vmbr2 is used for the pentesting course lab.
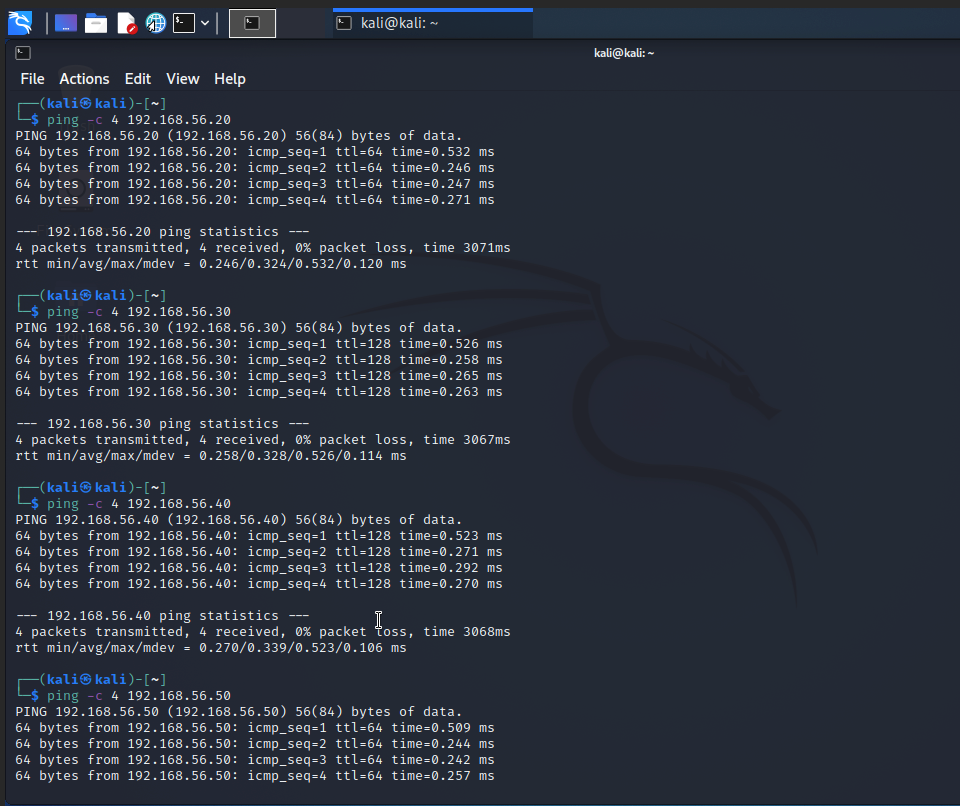
Target machines do not need a default gateway because they only need to communicate inside the lab subnet.
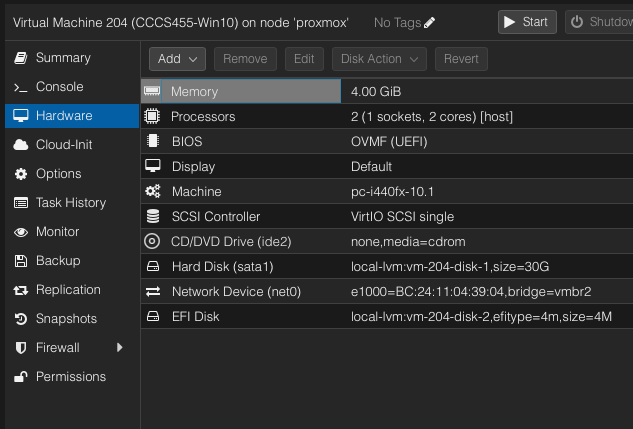
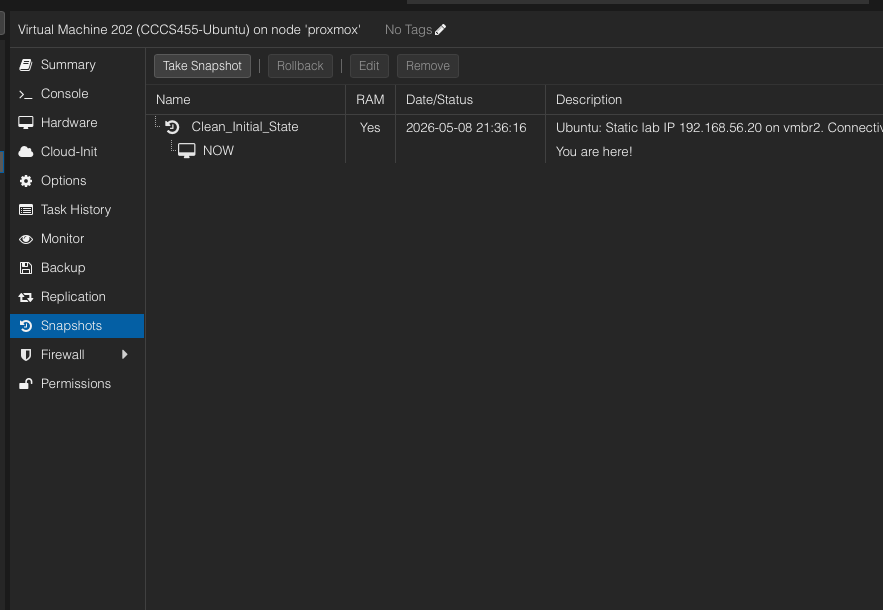
vmbr0: Proxmox management / home networkvmbr1: Wazuh SOC labvmbr2: Pentesting lab networkKali: 192.168.56.10Ubuntu: 192.168.56.20Windows 10: 192.168.56.30Windows Server: 192.168.56.40OWASP BWA: 192.168.56.50
This setup required more than importing a few VMs. I had to troubleshoot networking, storage, boot modes, and firewall behaviour across Linux and Windows machines.
.vmdk file instead of the numbered disk chunks.This project shows that I can build and troubleshoot a realistic virtual cybersecurity lab rather than relying only on preconfigured desktop tools. It demonstrates virtualization, network segmentation, VM migration, Windows/Linux networking, and safe handling of vulnerable machines. It also creates a foundation for connecting offensive testing activity with defensive monitoring in my SOC lab later.
Build Breakdown
The lab was built around a simple rule: vulnerable machines stay on the pentesting bridge, while Proxmox management and SOC infrastructure remain on their own networks.
Step 1
Created vmbr2 as a separate virtual switch for the pentesting lab, keeping it away from both Proxmox management traffic and the Wazuh SOC lab bridge.
Step 2
Extracted course VM archives, identified the main VMware .vmdk descriptor files, and imported the disks into Proxmox
using qm importdisk.
Step 3
Assigned each lab machine a stable IP address on 192.168.56.0/24 so exercises can reference the same targets reliably.
Step 4
Tested connectivity from Kali to each target, fixed firewall and boot issues, then created clean initial snapshots before lab work.
Lab Inventory
Each VM has a defined role in the lab and a predictable static IP address.
Attacker workstation for authorized scanning, enumeration, web testing, and exploitation exercises.
192.168.56.10
Vulnerable Linux target used for service discovery, exploitation practice, and post-exploitation exercises.
192.168.56.20
Windows workstation target used for Windows-based testing and client-side lab scenarios.
192.168.56.30
Windows server target used for server-side enumeration, firewall testing, and Windows network practice.
192.168.56.40
Vulnerable web application target used for web security testing inside the isolated lab network.
192.168.56.50
Security Lab Notes
These assignments used the isolated Proxmox pentesting lab shown above. They are documented as supporting lab work rather than separate standalone projects.
Client-Side Security
A controlled Kali Linux and Windows 10 exercise focused on browser exploit reliability, sandboxing, payload delivery, evidence validation, and defender visibility.
OWASP WebGoat · Web Security
A controlled WebGoat and Burp Suite exercise focused on request inspection, exposed application logic, unsafe input handling, and defender-oriented analysis.
Evidence
Add screenshots here showing the Proxmox bridge setup, VM hardware summaries, ping tests from Kali, Windows firewall rule, and successful boot/login screens. Avoid posting passwords, course download links, or any private school materials.
Next Stage
Explore controlled monitoring scenarios where selected lab activity can be observed by the Wazuh SOC environment.
Import additional vulnerable machines to support more advanced penetration testing exercises.